Reserved for project updates
Project Update 1/17/17:Today, I started the process of wiring up the e-locker harness. I tapped into the factory "Diff Lock" light in the instrument cluster so that I'll have the dash light to let me know when the locker is physically engaged. The light uses a negative input in the factory instrument cluster harness, which you can tie right to the end switch in the e-locker. That way, when the light is on, you know you have positive engagement of the locker.
I still haven't decided exactly where to install the switch, as all of my factory switch ports are in use (too many accessories and lights I guess). I'm tempted to mount it on the overhead console, in front of the sunglasses holder, and relocate the ARB air compressor switch next to it as well. That way, they're both up high on the roof and away from the dash, and would be nearly impossible to accidentally engage (this is a concern of mine with the locker directly wired).
Acquisition of parts for the project is well underway. I have just about everything I need, but there are still a few things left:
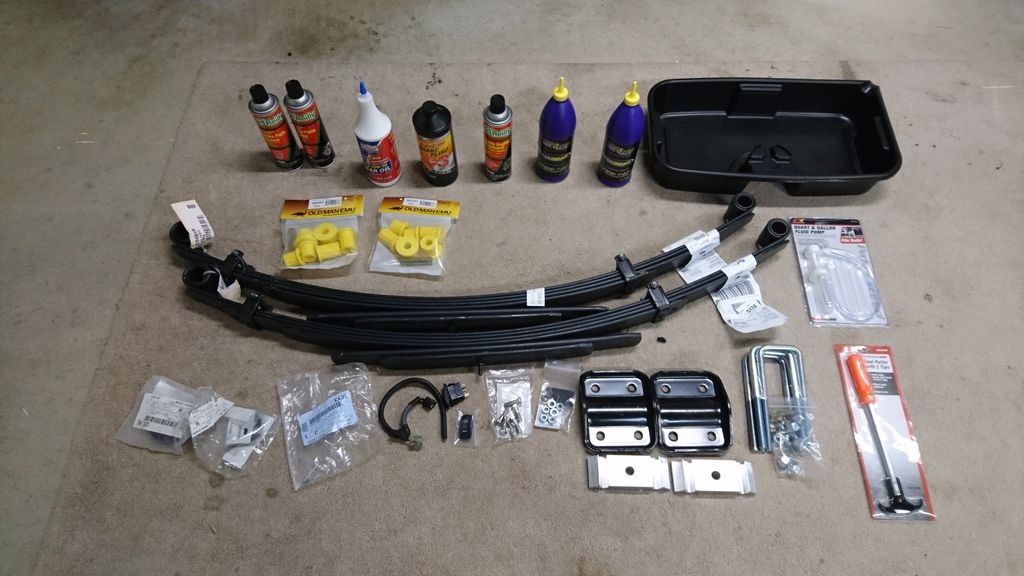
Rear axle swap project
Here's what I have so far:
1. New Old Man Emu medium duty Dakar leaf springs
2. Bushings for the leaf springs
3. New PRG U-bolt flip kit
4. Used R180 differential with 3.36 gearing (not pictured)
5. Used M226 axle with 3.36 gearing and e-locker (not pictured)
6. New OEM Nissan R180 axle seals (left and right)
7. New OEM Nissan breather nipple for axle (for extended diff breather mod)
8. 2 quarts of Royal Purple synthetic 75W-140 gear oil for rear diff
9. 1 quart of Lucas Oil 80W-90 gear oil for the front diff
10. 1 large bottle of DOT3 brake fluid
11. 2 cans of brake parts cleaner (the stupid California compliant kind)
12. New OEM Nissan bolts and nuts (6 of each) to attach the driveshaft to the rear diff
13. 1 can of foaming degreasing spray to clean up the M226 axle before installation
14. Used OEM Nissan E-locker harness
15. OTRATTW "rear locker" illuminated rocker switch
16. Cheap Harbor Freight special "seal puller." Not even sure why I need this, but it was only like 3 bucks and I've been told it makes it much easier to change the R180 axle seals
17. Fluid pump (for transfer case fluid change)
18. New drain pan (I already have one, but a second one wouldn't hurt for a project of this size)
19. A box of gallon-sized ziplock (freezer) bags for nuts and bolts and other parts, to help speed up re-assembly
20. Anti-seize and a tub of grease (thanks to RikRong for the loan!)
Other stuff I already have on hand/around the garage:
1. Two 3-ton floor jacks
2. A pair of 6 ton jack stands and another pair of 3 ton jack stands
3. Plenty of Fast Orange hand cleaner and Lava soap
4. Headlamps
5. Several rolls of shop towels and some rags
6. 3/8" Metric Hex Sockets (for drain plugs)
7. Air compressor, impact wrench and air ratchet
8. 1/2" drive torque wrench
Still need to purchase or borrow for the project:
1. Socket for the front axle nuts (will probably purchase one, since it's good to have one in the tool bag.
Just need a good lead on one since I've heard that some are too thick to fit through the hole in the front hub assembly)
2.
Another pair of jack stands - so we can work on the front and rear at the same time while also having the axle supported on a pair while brake parts are swapped over (would like to borrow a set from someone who is coming to help, if possible) Will no longer need these, as I've now broken the project up to do the rear first and then the front.3. Transfer case fluid - I think I'll be buying the genuine Nissan stuff,
unless someone can recommend a good aftermarket solution. I didn't want to buy the cheap store brand stuff, and that's all they had at the auto parts stores around me
4.
Black RTV Silicone Sealant for the diff cover I used some gray RTV I had on hand already.5.
A new box of disposable gloves, as I'm getting pretty low I picked up a new box already.6.
Smaller 3/8" drive torque wrench for some of the smaller stuff like the drive shaft bolts (would like to borrow one from someone coming to help, if possible) Turns out I don't need one after all. I've been able to use my 1/2" drive one for the few things I'm torquing to spec.7.
A small pack of cloth shop towels I ended up finding plenty of rags around the garage to useProject update 1/27/17:I took the axle outside and gave it a bath in some foaming engine degreaser. Just wanted to get some of the brake fluid and other crud off of it, so it's a little easier to handle.
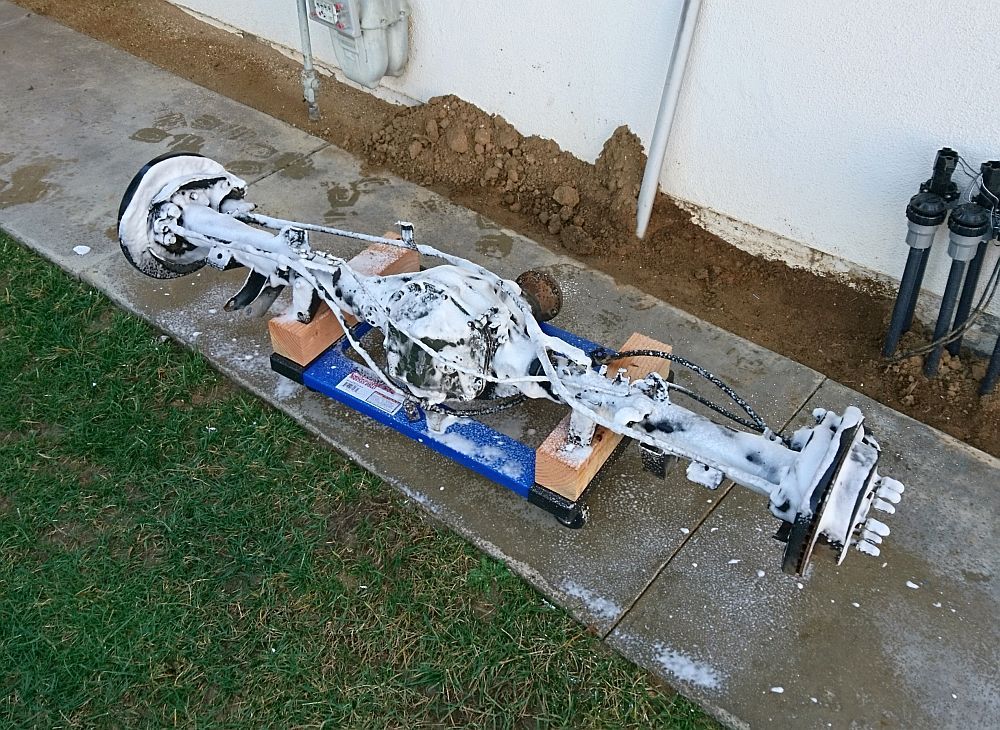
Rear axle swap project
After the bath, I brought it inside and got it up on some jack stands to be easier to work with. I popped the rear diff cover off and gave it a good inspection. Everything looks nice and intact inside, with no chips or pits in the metal on the gears. I let the old gear oil drain out overnight so that I was confident as much of it as possible was gone.
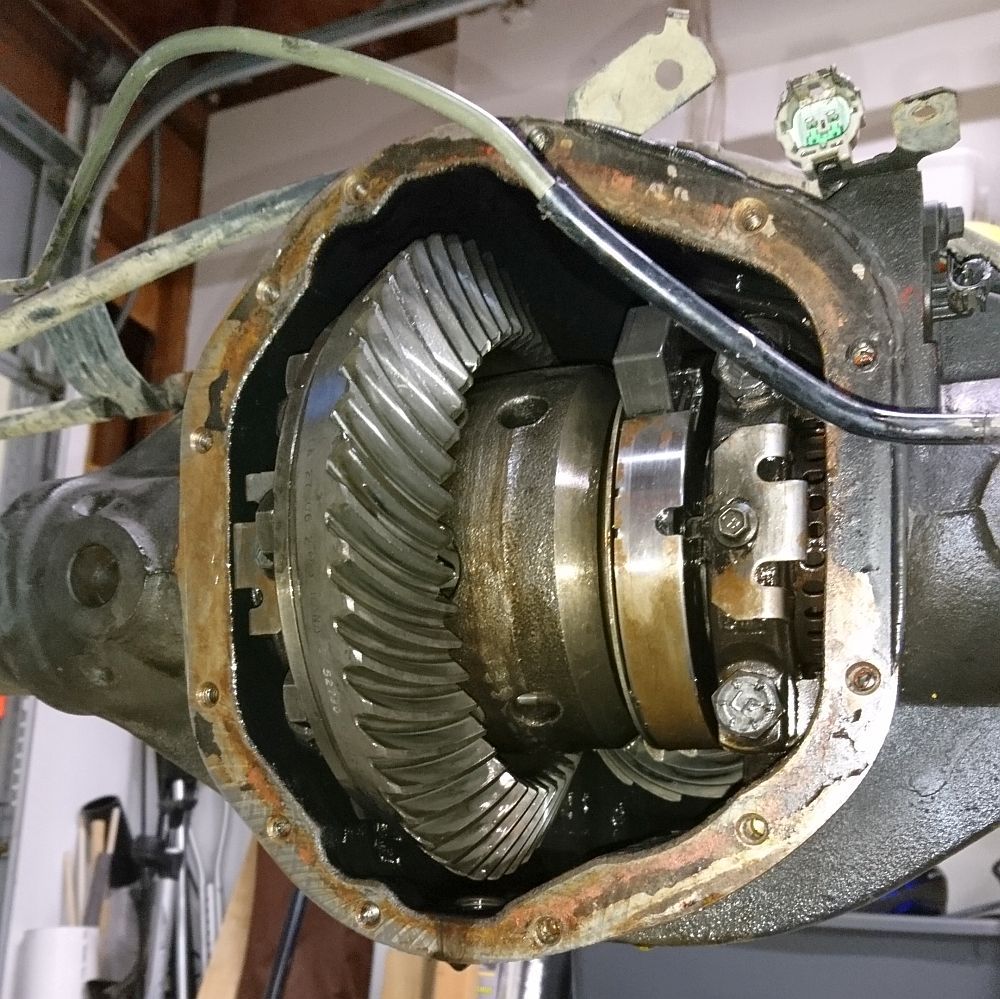
Rear axle swap project
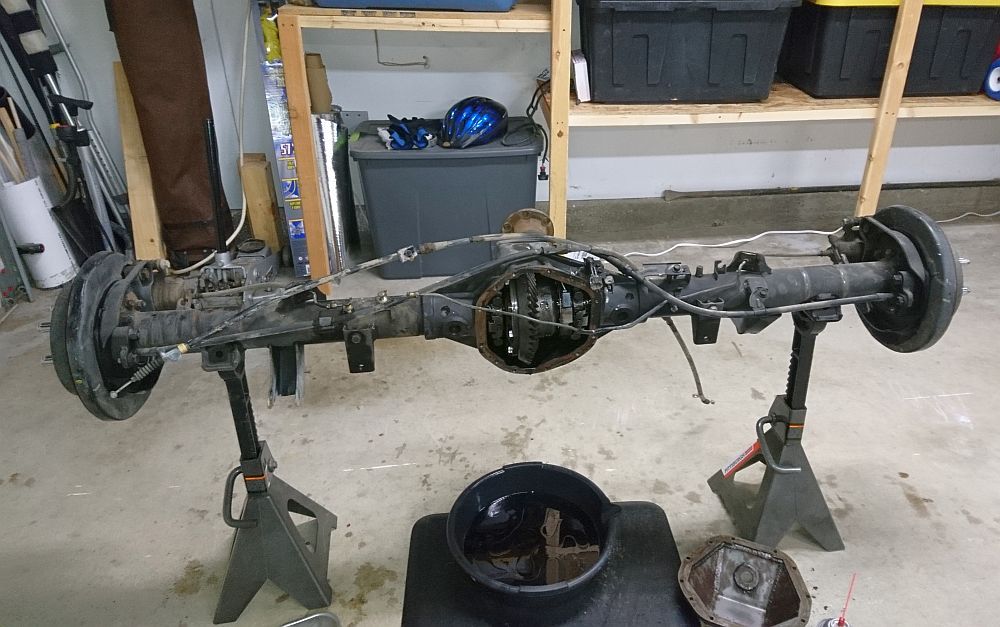
Rear axle swap project
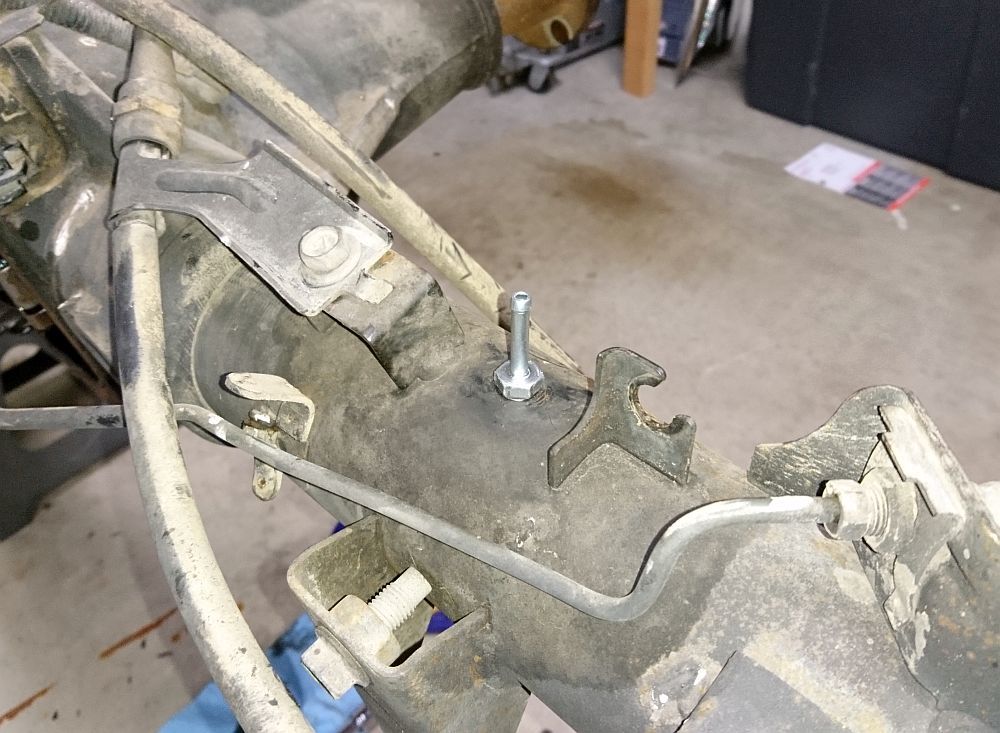
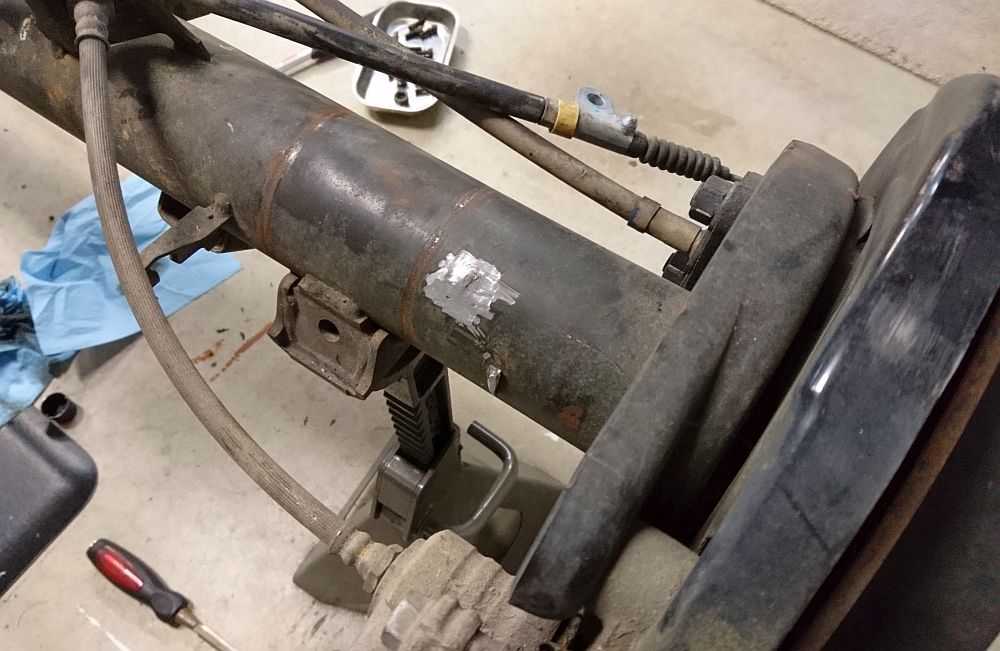
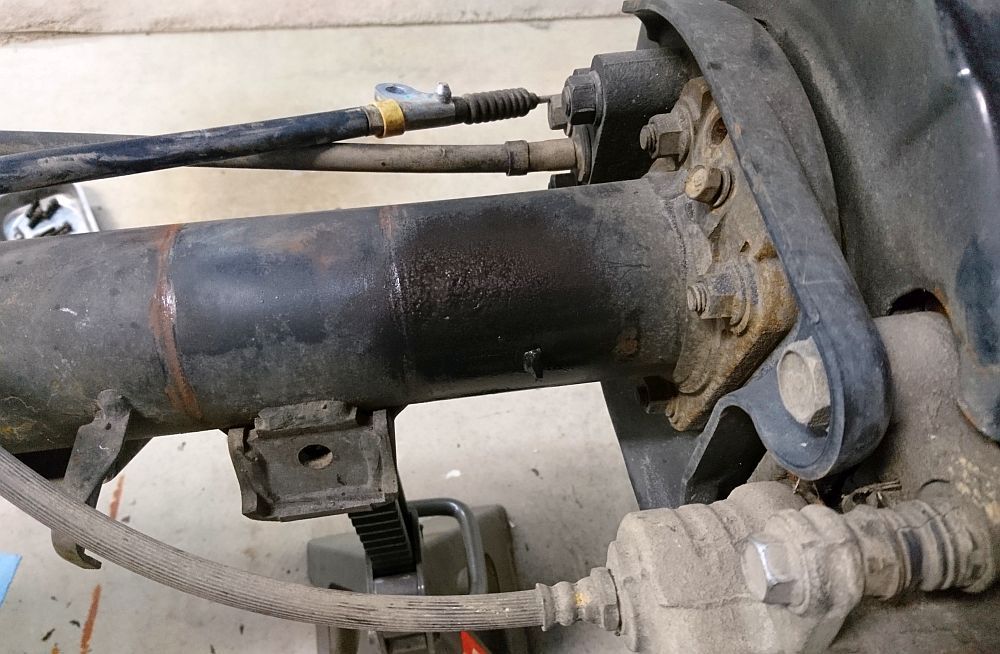
I installed my new breather nipple (to simplify the connection of the hose for my diff breather mod), and cut off/ground down the tabs for the abs sensor wires. This is necessary in order for the U-bolt flip kit to be installed (there is one edge of the outermost tabs that gets in the way of the upper plate for the flip kit). After they were ground away, I hit the bare metal spots with a spritz of black spray paint to hold the rust off as long as possible.
Rear axle swap project
Rear axle swap project
Rear axle swap project
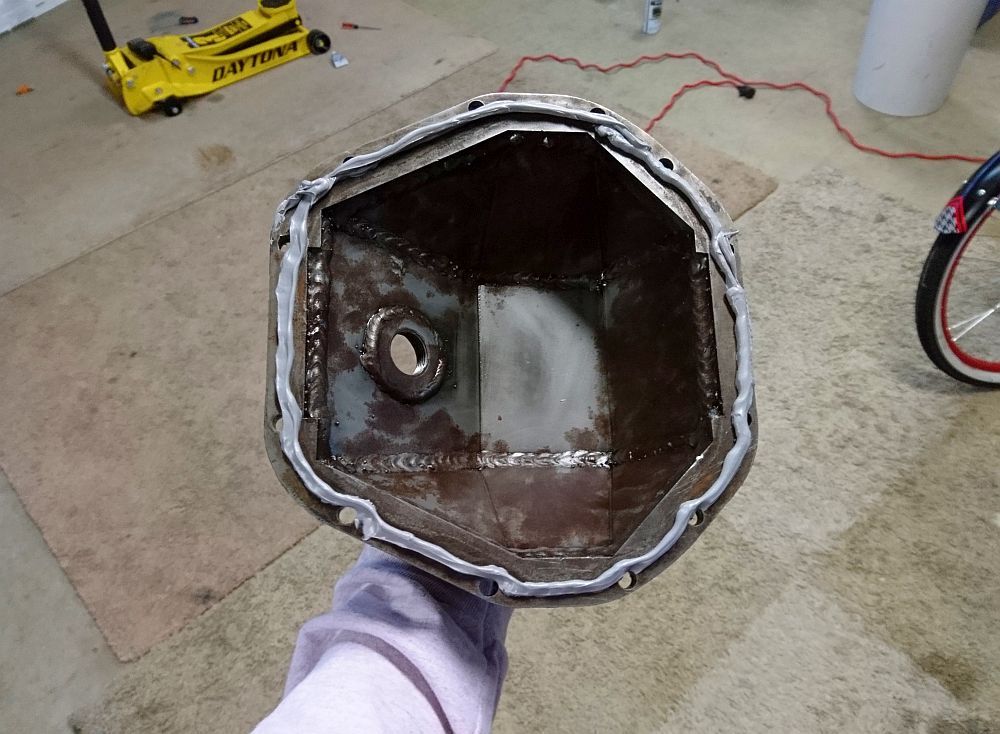
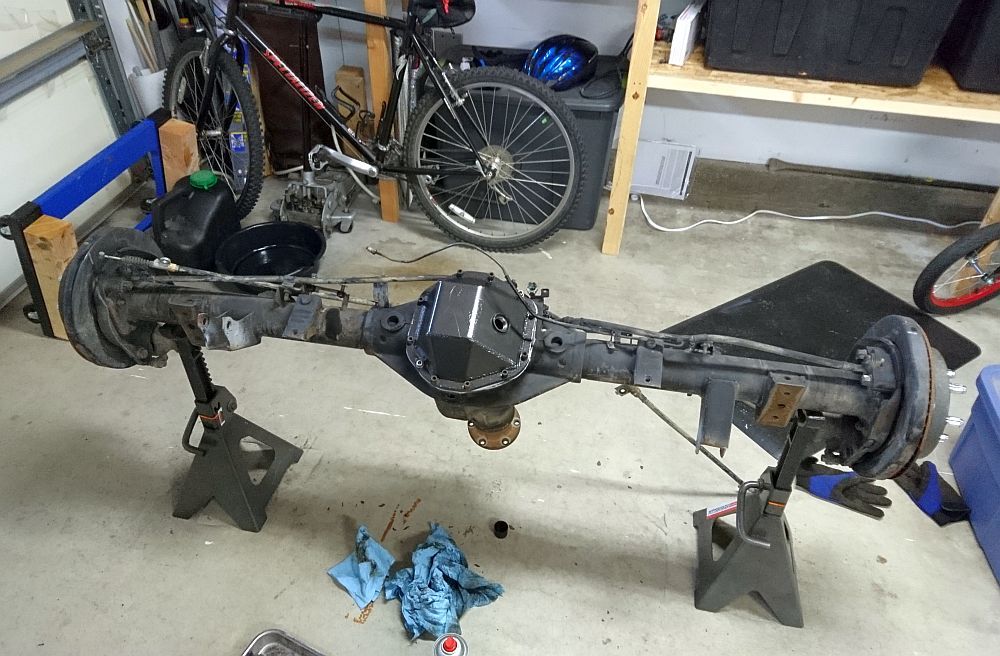
Then it was time to reinstall the diff cover. This axle came with an aftermarket diff cover (I think it's one of the BTF ones, but it fits like a glove). I can clearly tell that this cover spent part of it's life in bright pink (and it even has an outline of a breast cancer ribbon in the old paint), so I gave it a couple coats of the same black "hammered finish" spray paint that I used on my skid plates. You can see the outline of the ribbon pretty good in the photo, but it's not nearly that noticeable in person. I used the same gray RTV silicone that I used on my previous diff cover install (on my C200 axle), and made sure to get a good even bead on it. I slid the jackstands off of the spring perches so that the yoke would turn downward, which allowed me to install the diff cover much easier than it normally is when your axle is already on the truck. I slowly placed it on the back of the diff, perfectly aligned with the holes. I then installed the screws and finger tightened them, allowing the RTV to set for about 20 minutes and firm up a little. At that point, I tightened the screws the rest of the way.
Rear axle swap project
Rear axle swap project
At this point, she's as ready for install as she can be, until I'm ready to actually start pulling parts off my truck. I'll swap most of the brake components over next (all of the brake parts on my rig are only about 20,000 miles old, vs. about 90,000 miles on this axle), but I can't really do that until I'm ready to actually swap the axle in since I need brakes.
